Smart Contracts with Solidity and Ethereum

Since my last encounter with Ethereum few years ago things are now much simpler to get started. Here my notes and hope they help you as well!
Simplified Overview
The outcome we are looking for is to have a network of nodes each with identical data. This is nothing new and the CAP theorem is well understood for such distributed systems. So let us add some additional constraints:
- Untrusted nodes — nodes in this network maybe be owned by different entities including those with malicious intent
- Append only — data is immutable
This brings us to Distributed Ledgers (DLT) and blockchains like Bitcoin and Ethereum. These technologies enable chains of distributed, immutable, linked transactions validated by various cryptographic means so we achieve the required outcome. There are numerous variations and competing companies but describing such details in not my goal (see this Khan Academy talk for example).
In this post I am interested in the applications of such distributed data stores and dapp (distributed application) is the buzzword for that. So as a client how do I work with such a distributed network? I am going to focus on very specific areas and deliberately not mention similar other technologies and you can do all of this in your browser!

Smart Contracts
A smart contract is basically a program to be executed in the network of nodes so that each node can process it and finally achieve the end state by agreeing on a new Block N+1. There is nothing legal or contractual here. There are numerous programming languages to write such programs and today I am writing about Solidity.
Ethereum Network
Ethereum has its own blockchain and the new innovation it brought is the Ethereum Virtual Machine (EVM) that enables it to become the generic platform for any number of applications (turing complete).

To start with smart contracts let us draw on a Java analogy, and the typical steps are:
- Write your code — instead of a .java file it is now a .sol file with the Solidity syntax
- Compile your code — produce byte code
- Execute the byte code — the JVM executes the Java byte code while the EVM executes the Ethereum byte code
This execution step is also where things digress completely. While your Java code would typically execute on a few servers, the Ethereum code must execute on every node in the network! Each node must therefore be able to deterministically execute the code. This means the code you write can only utilize the data in the current state and any given inputs. Therefore it cannot generate random numbers or connect to external data sources.
There is compute and storage cost for the nodes so you must pay for that when you submit a request (using something called gas). There are “transactions” that cost gas and there are also free “calls” to simply read the state.
Writing and Compiling code
Open a browser tab to: https://remix.ethereum.org/. This opens the development environment. Under the “contracts” folder you will notice three sample .sol files. 1_Storage.sol is the basic hello world program that allows you to store a number and then retrieve it. You may have never seen Solidity previously but its a fairly simple class with a private number and getter and setter for it.

To compile it switch to the second tab and click compile. You can inspect various interesting compilation details.

Deploying your contract
The final step is to execute your contract. Let us understand what happens first:
- The byte code is submitted the network and eventually all nodes receive it
- Along with the submission you also need to provide compensation for resources that will be used and is required depending on the operations. This is called gas and comes from the ETH tokens you must have so an Externally Owned Account (EOA) address must be provided and it is the public key of your key-pair. This looks like: 0x4C8a…123
- Each node now processes these instructions. If we are deploying a new contract then a contract account gets created
- Once consensus is achieved this contract account with its own address is then available and other contract accounts or EOAs may interact with it
For development we will use local emulators and also a test network.
Emulator
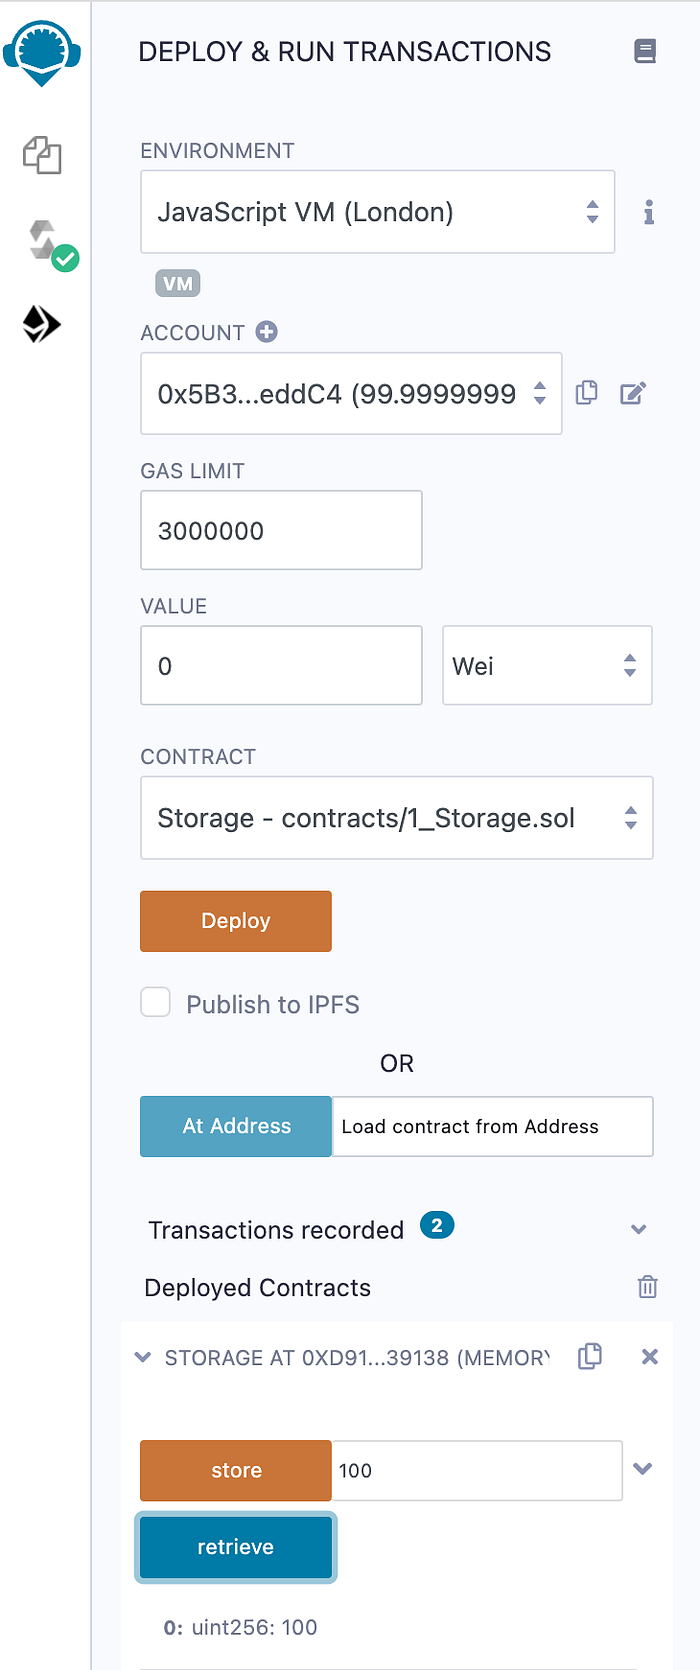
Switch to the next tab and the Environment: JavaScript VM is the emulator. The various accounts listed are the EAOs in the simulator. Pick the contract and deploy. After that under “deployed contracts” you will see the instance of the contract with its address. With a specific contract you can now store and retrieve a number.
Rinkeby Test Network
For this first install MetaMask to create your EAOs. After installing switch to Rinkeby and get some test token from one of the “faucets.” The consensus method used by this network makes it fast.

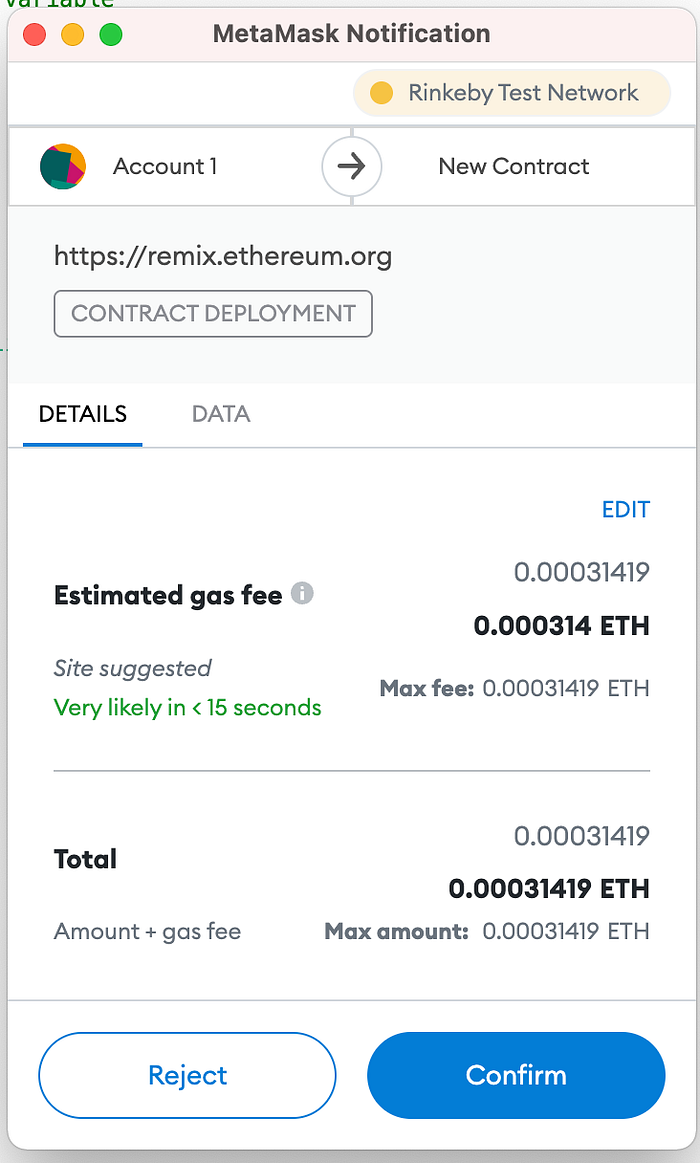
After you have this setup complete in the deployment tab pick the Environment: Injected Web 3 (you may need to reload and connect meta mask if you just installed it) — Web 3 is just a library that lets you connect to the Ethereum network. MetaMask will prompt you to confirm the cost.
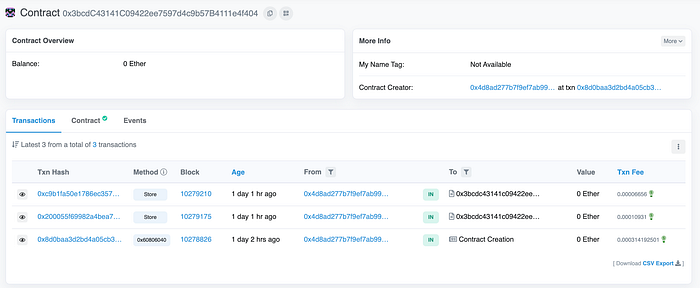
As with the emulator you can store and retrieve a number. Now however this contract is publicly available on this test network!
You can see a contract I created and also see the transactions to store a value in it.
You could use the contract address and send a call to it as well. This concludes the hello world example. Look at the more complex examples Remix provides. I will write about some more useful contracts next time.
If these topics interest you then reach out to me and I will appreciate any feedback. If you would like to work on such problems you will generally find open roles as well! Please refer to LinkedIn.